
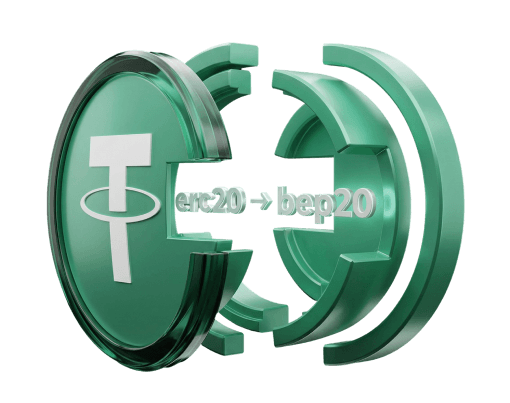
Escape High Ethereum Fees: Your Definitive Guide to Converting USDT ERC20 to BEP20
Why Make the Switch from ERC20 to BEP20?
If you have ever used the Ethereum network, you are likely familiar with its primary challenge: high transaction fees, commonly known as gas fees. During periods of network congestion, a simple token transfer can become prohibitively expensive, making small or frequent transactions impractical. The Binance Smart Chain (BSC) offers a compelling alternative.
The main reasons to convert your USDT from the ERC20 (Ethereum) to the BEP20 (BSC) standard are to save money and time. BSC was designed for high throughput and low costs, meaning transaction fees are typically a fraction of those on Ethereum, often costing just a few cents. Additionally, BSC has faster block confirmation times, so transactions finalize in seconds rather than minutes. This speed is essential for time-sensitive activities like trading or using decentralized finance (DeFi) protocols within BSC's large and growing ecosystem of decentralized applications (dApps).
By moving your USDT to the BEP20 network, you choose a more efficient and cost-effective platform for your digital assets, allowing you to use them more freely without the constant concern of exorbitant fees.

Your Conversion Options: A Clear Comparison
There are two primary and reliable methods for converting your USDT from ERC20 to BEP20. The best choice depends on your priorities regarding ease of use, decentralization, and trust.
The first option is the centralized exchange (CEX) route. This is often the simplest method, especially for those familiar with platforms like Binance. It involves using the exchange as an intermediary to handle the cross-chain conversion internally.
The second option is the cross-chain bridge route. This decentralized method allows you to move assets directly between blockchains without a traditional intermediary, functioning like a digital currency exchange that swaps your assets from one blockchain to another.
Method 1: The Centralized Exchange Route – Simple and Secure
Using a large, reputable centralized exchange is arguably the most user-friendly way to perform this conversion, as the platform handles the complex technical steps.
Deposit ERC20 USDT to the Exchange
Log in to your exchange account and find your spot wallet. Select USDT and choose the 'Deposit' option. It is crucial to select the ERC20 (Ethereum) network for your deposit. The exchange will provide you with a unique ERC20 deposit address.
Send USDT from Your Wallet
From your personal wallet, such as MetaMask or Trust Wallet, initiate a transfer of your USDT. Paste the exchange's ERC20 deposit address and confirm the transaction. You will need to pay a one-time Ethereum gas fee for this deposit.
Withdraw BEP20 USDT from the Exchange
After the deposit is confirmed on the blockchain and credited to your account, find USDT in your spot wallet again and select 'Withdraw'. Enter the withdrawal amount and, most importantly, select the BEP20 (Binance Smart Chain) network. Paste your BEP20 receiving address from your personal wallet, complete any security verifications, and finalize the withdrawal. The fee for this will be a minimal BSC network fee.
Method 2: The Cross-Chain Bridge – The Decentralized Path
A cross-chain bridge is a decentralized application that enables the transfer of assets between different blockchains. This method is ideal for users who prefer to maintain self-custody of their assets throughout the process.
Connect Your Wallet to the Bridge
First, research and select a well-established and audited cross-chain bridge that supports the Ethereum and BSC networks. The reputation and security of the bridge are paramount. Navigate to the bridge’s official website and connect your Web3 wallet, such as MetaMask. Ensure your wallet is set to the Ethereum Mainnet to begin.
Configure and Initiate the Transfer
In the bridge's interface, set up the transfer by selecting USDT as the asset, Ethereum as the source chain, and Binance Smart Chain as the destination. Enter the amount you wish to bridge. You will likely need to approve two transactions: first, an 'approval' to allow the bridge's smart contract to access your USDT, and second, the main transfer. Both will require paying Ethereum gas fees.
Receive Your BEP20 USDT
Once you confirm the transactions, the bridge will process the transfer. This can take anywhere from a few minutes to over half an hour, depending on network traffic. After completion, the BEP20 USDT will appear in your wallet address on the Binance Smart Chain. You may need to switch your wallet’s network to BSC to view the funds.
Your Pre-Flight Checklist for a Secure Transfer
Regardless of your chosen method, security must be your top priority. A single mistake in cryptocurrency can be irreversible. Before initiating any transfer, review this essential checklist:
- Triple-Check Wallet Addresses: Always copy and paste addresses carefully. As an extra precaution, verify the first and last four characters after pasting to ensure it is correct. Sending funds to the wrong address will result in their permanent loss.
- Verify Website URLs: Double-check that you are on the official website for an exchange or a cross-chain bridge. Bookmark trusted sites and be wary of phishing links from emails, social media, or search results.
- Understand All Fees: Be clear about the costs involved. This includes the Ethereum gas fee, any platform fees charged by the bridge or exchange, and the final withdrawal fee.
- Start with a Small Test Transaction: If you are using a new platform or performing this transfer for the first time, send a small amount first. Once you confirm it arrived safely, you can proceed with the larger amount.
- Assess Platform Reputation: Only use well-known exchanges and audited cross-chain bridges. Look for user reviews, security audits, and a long track record of reliability.
Choosing Your Path: A Final Summary
Successfully converting your USDT from ERC20 to BEP20 unlocks a world of lower fees and faster transactions on the Binance Smart Chain. By understanding your options, you can choose the method that best aligns with your needs.
The centralized exchange route is ideal for beginners or those who prioritize simplicity and the security offered by a trusted, large-scale platform. The process is straightforward, though it requires temporarily relinquishing custody of your funds.
The cross-chain bridge route is suited for more experienced users who value decentralization and wish to maintain self-custody of their assets at all times. It offers a direct wallet-to-wallet transfer but requires more careful vetting of the platform and a better understanding of wallet interactions.
Whichever path you select, adhering to the security checklist is non-negotiable. By performing due diligence and double-checking every detail, you can confidently and efficiently move your assets to the more economical Binance Smart Chain.
This article is for informational purposes only and does not constitute investment advice. You should act at your own risk and, if necessary, seek professional advice before making any financial decisions.
Frequently asked questions
-
Can I convert USDT from BEP20 back to ERC20?
Yes, the process is reversible. You can use the same methods in reverse. On a centralized exchange, you would deposit USDT via the BEP20 network and then withdraw it using the ERC20 network. Similarly, a cross-chain bridge can be configured to transfer from BSC back to Ethereum. -
What are the main risks when using a cross-chain bridge?
The primary risks involve smart contract vulnerabilities and platform security. A poorly coded or unaudited bridge could be exploited by hackers, potentially leading to a loss of funds. For this reason, it is crucial to use only highly reputable and well-audited bridges. -
Do I need BNB tokens for this process?
Yes. You will need ETH to pay the initial gas fees on the Ethereum network. Once your USDT is on the Binance Smart Chain (BEP20), you will need a small amount of BNB in your wallet to pay for any future transaction fees on the BSC network, as BNB is its native gas token. -
How long does the conversion process typically take?
The time varies based on the method and network congestion. Using a centralized exchange, the entire process might take 15-30 minutes. A cross-chain bridge can take a similar amount of time, but it is highly dependent on the traffic on both the Ethereum and BSC networks. -
Is there a minimum or maximum amount of USDT I can convert?
This depends on the platform you use. Most centralized exchanges have minimum withdrawal amounts, which are usually quite small. Cross-chain bridges may also have minimum transaction sizes to ensure the transfer is economical after fees. Maximum limits are typically very high or non-existent for most users.